 The Clarinet BBoard The Clarinet BBoard
|
Author: Chris P
Date: 2021-11-02 04:32
Attachment: P1010005.JPG (709k)
Attachment: P1010019.JPG (707k)
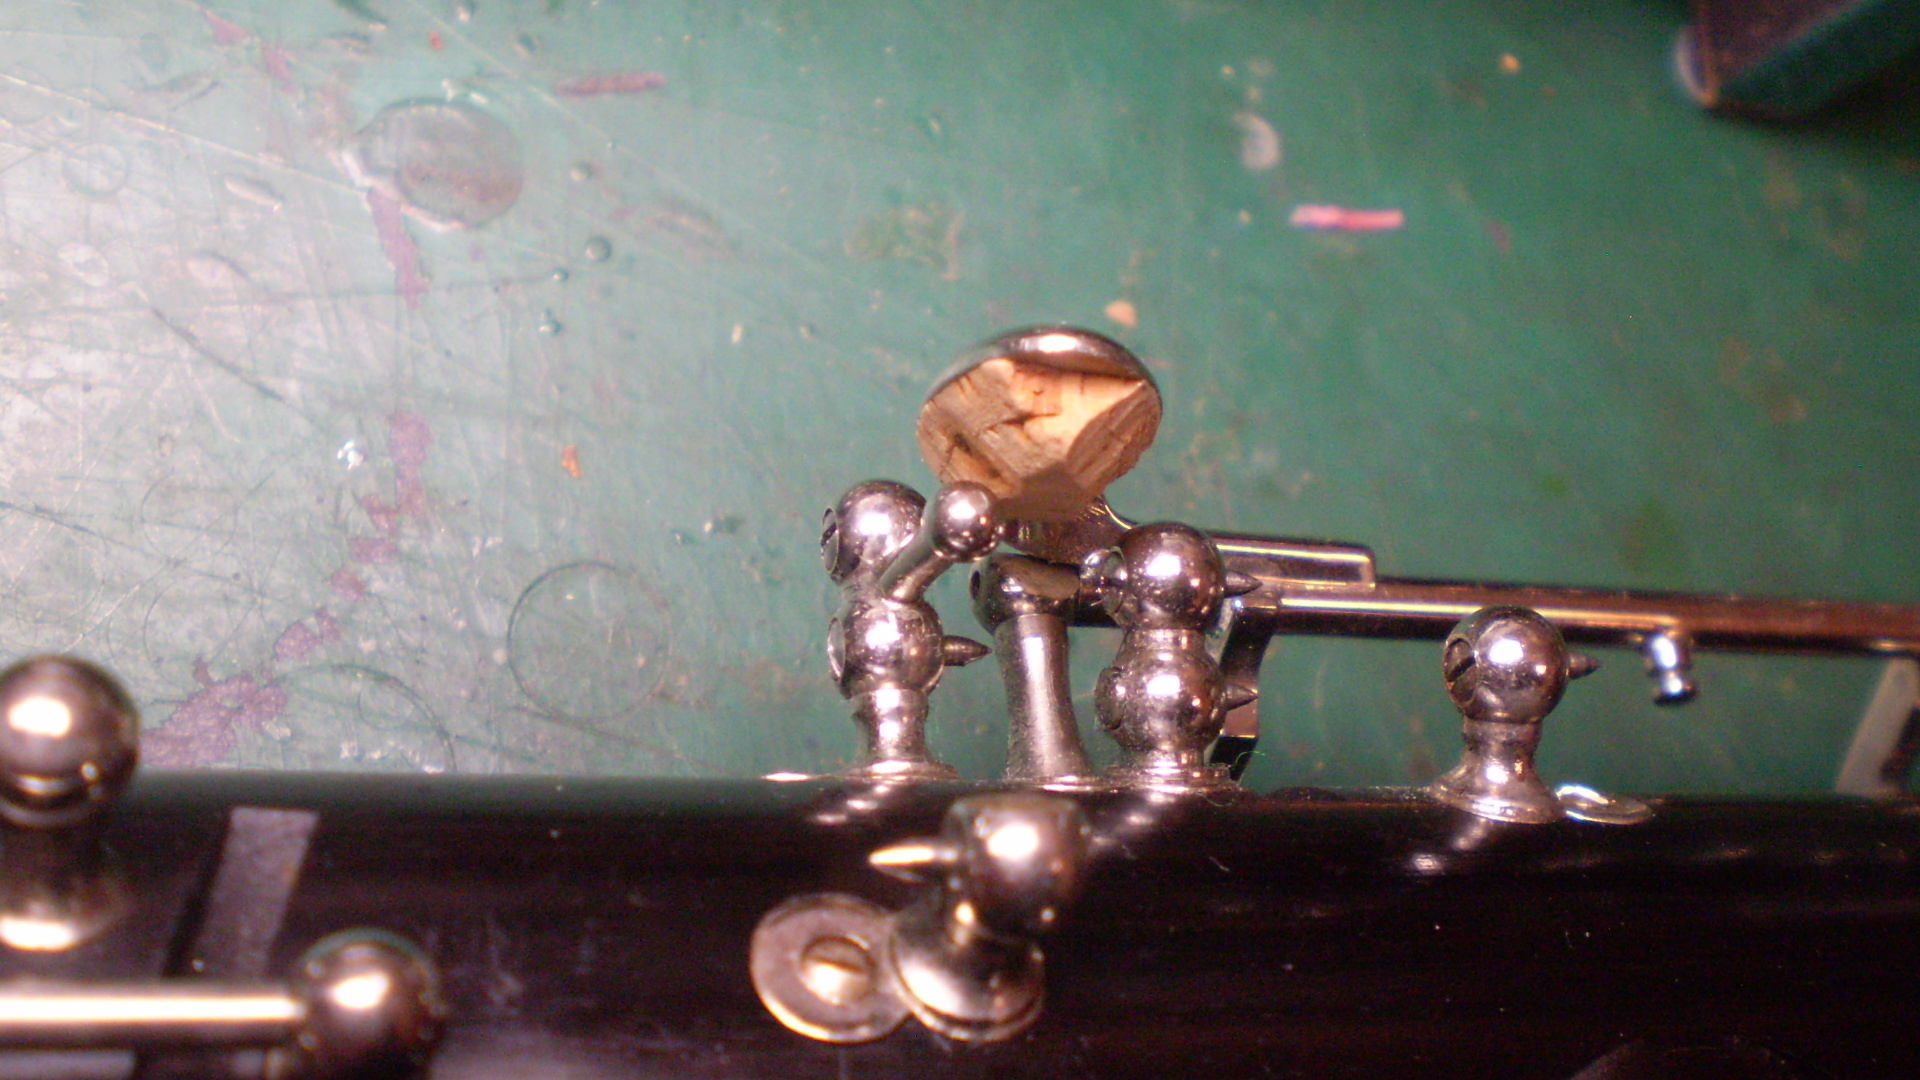
Contact adhesive is best used for key corks - there are various brands depending on your locale (Evo-Stik is popular in the UK) and it's the same stuff used to bond lino, vinyl or formica to plywood, MDF or other hard surfaces.
Thoroughly clean and degrease the underside of the key where the key cork is to be glued onto, then coat both that surface and the surface of the key cork thinly and evenly and set them by for the solvent to evaporate to leave the adhesive touch dry which takes a matter of minutes.
Then stick both glued surfaces together, press them firmly to expel any trapped air and trim them using a fresh razor blade or scalpel following the shape of the key for a neat finish. Trim around the sides of the key corks to make them nicely bevelled instead of leaving them square as that will look much better. For the trill keys and side F# key, you can leave the long sides of the key corks straight sided and bevel the ends with the bevel nearest the touchpiece following the angle of the underside of the key.
Only use an even thickness of cork of the thickness you need instead of using a really thick cork and trimming or sanding it down which will make it look uneven. The only place you'd have a thick, wedge-shaped key cork on most clarinets is on the throat A key.
In time you'll most likely move away from using natural cork as it has its limitations where keywork is concerned and use more durable and synthetic materials as well as felt in certain places to reduce or eliminate key noise.
Also it's much better to fit a gently domed nylon tip to the throat G#-A adjusting screw as that will glide more smoothly on the throat A key than sticking cork in the slot which feels spongy, creates a lot of friction and the adjusting screw tip will soon chew through it.
The only places I use natural cork on clarinets are the tenon corks, thumbrest cork and the throat A stopper. For a novice, using cork everywhere will allow you to develop your skills for both trimming cork nicely and working out the thicknesses you require as well as being easier to adjust compared to other materials.
While some adjustments can be made by trimming or sanding key corks, you'll still have to learn how to adjust keys by bending them - both to adjust the regulation and also to make sure they all line up and sit well under the fingers as well as making sure the ring keys sit at a decent height in relation to the tonehole chimneys when held down and so they sit evenly front to back instead of high on one side and low on the other.
One thing to beware of are dry solder joints where the solder hasn't flowed through the joint (usually between a touchpiece or key arm and the key rod or barrel) leaving it weak, only to break at the joint when the key is bent. Most broken keys can be cleaned up and resoldered (hard/silver soldering as opposed to soft/lead/tin/electrical solder) although the plating will most likely be damaged due to the heat involved which will mean they'll need to be tidied up, replated and refitted to the instrument.
See attachments for a really crappy key cork on the Ab/Eb key on a Selmer bass, then the much thinner one I used which is all it needs.
Former oboe finisher
Howarth of London
1998 - 2010
The opinions I express are my own.
Post Edited (2021-11-02 14:45)
|
|
|
Richard Starkly |
2021-10-13 16:13 |
|
Ken Lagace |
2021-10-13 17:41 |
|
Chris P |
2021-10-13 17:59 |
|
Paul Aviles |
2021-10-13 18:52 |
|
LFabian |
2021-10-13 21:46 |
|
Chris P |
2021-10-14 01:34 |
|
SunnyDaze |
2021-10-17 13:56 |
|
Richard Starkly |
2021-11-01 19:10 |
|
paulyb |
2021-11-01 22:11 |
|
Paul Aviles |
2021-11-02 02:02 |
   |
Re: Pad Repair Advice new |
|
Chris P |
2021-11-02 04:32 |
|
The Clarinet Pages
|
 |
